准备工作
编译
拉代码构建二进制,这里面最主要的就是DEBUG=1dapr里只要加了这个,构建二进制的时候就会构建附带debugger信息的二进制版本。
git clone https://github.com/dapr/dapr.git
cd dapr
make release GOOS=linux GOARCH=amd64 DEBUG=1
构建镜像
构建debug镜像,推送到自己的私有仓库。如果你在国内环境运行,在构建镜像时需要安装dlv,如果遇到连接GitHub的网络问题,你可以修改./docker/Dockerfile-debug,添加一行ENV GOPROXY https://goproxy.cn,direct设置一下代理即可。
export DAPR_TAG=dev
export DAPR_REGISTRY=<your docker.io id>
docker login
make docker-push DEBUG=1
安装
安装dapr debugging 二进制
如果你已经安装了,你需要先卸载
dapr uninstall -k
然后通过helm的方式安装新构建的dapr,首先添加helm repo并且update.
// Add the official Dapr Helm chart.
helm repo add dapr https://dapr.github.io/helm-charts/
// Or also add a private Dapr Helm chart.
helm repo add dapr http://helm.custom-domain.com/dapr/dapr/ \
   --username=xxx --password=xxx
helm repo update
# See which chart versions are available
helm search repo dapr --devel --versions
Dubug 控制面
新建一个values.yml文件,要对哪个组件启动debug就把对应组件的debug.enable改为true.可以选择的组件有 dapr_operator dapr_placement dapr_sentry dapr_sidecar_injector
global:
   registry: docker.io/<your docker.io id>
   tag: "dev-linux-amd64"
dapr_operator:
  debug:
    enabled: true
    initialDelaySeconds: 20
然后通过helm命令安装
helm install dapr dapr/dapr --namespace dapr-system --create-namespace --values values.yml --wait
如果你已经安装过了debug版本的控制面,你可以通过更新的方式将某个控制面组件开启调试模式
helm upgrade dapr dapr/dapr --namespace dapr-system --install --reuse-values --set dapr_sidecar_injector.debug.enabled=true
查看待调试的程序pod名称:
$ kubectl get pods -n dapr-system
NAME                                     READY   STATUS    RESTARTS   AGE
dapr-dashboard-5f75457f45-r7f22          1/1     Running   0          20m
dapr-operator-78b867bcc6-sgjvq           1/1     Running   0          20m
dapr-placement-server-0                  1/1     Running   0          32m
dapr-sentry-85bcddcf6b-vjndf             1/1     Running   0          20m
dapr-sidecar-injector-56cd4c8cf7-nm49f   0/1     Running   0          11s
将调试端口转发出来,如果这条命令不是在你的本机执行,你可以添加--address '0.0.0.0' 来使转发的端口远程可访问。注意将下面转发的pod名称改为实际的pod名称。
kubectl port-forward dapr-sidecar-injector-56cd4c8cf7-nm49f 40000:40000 -n dapr-system
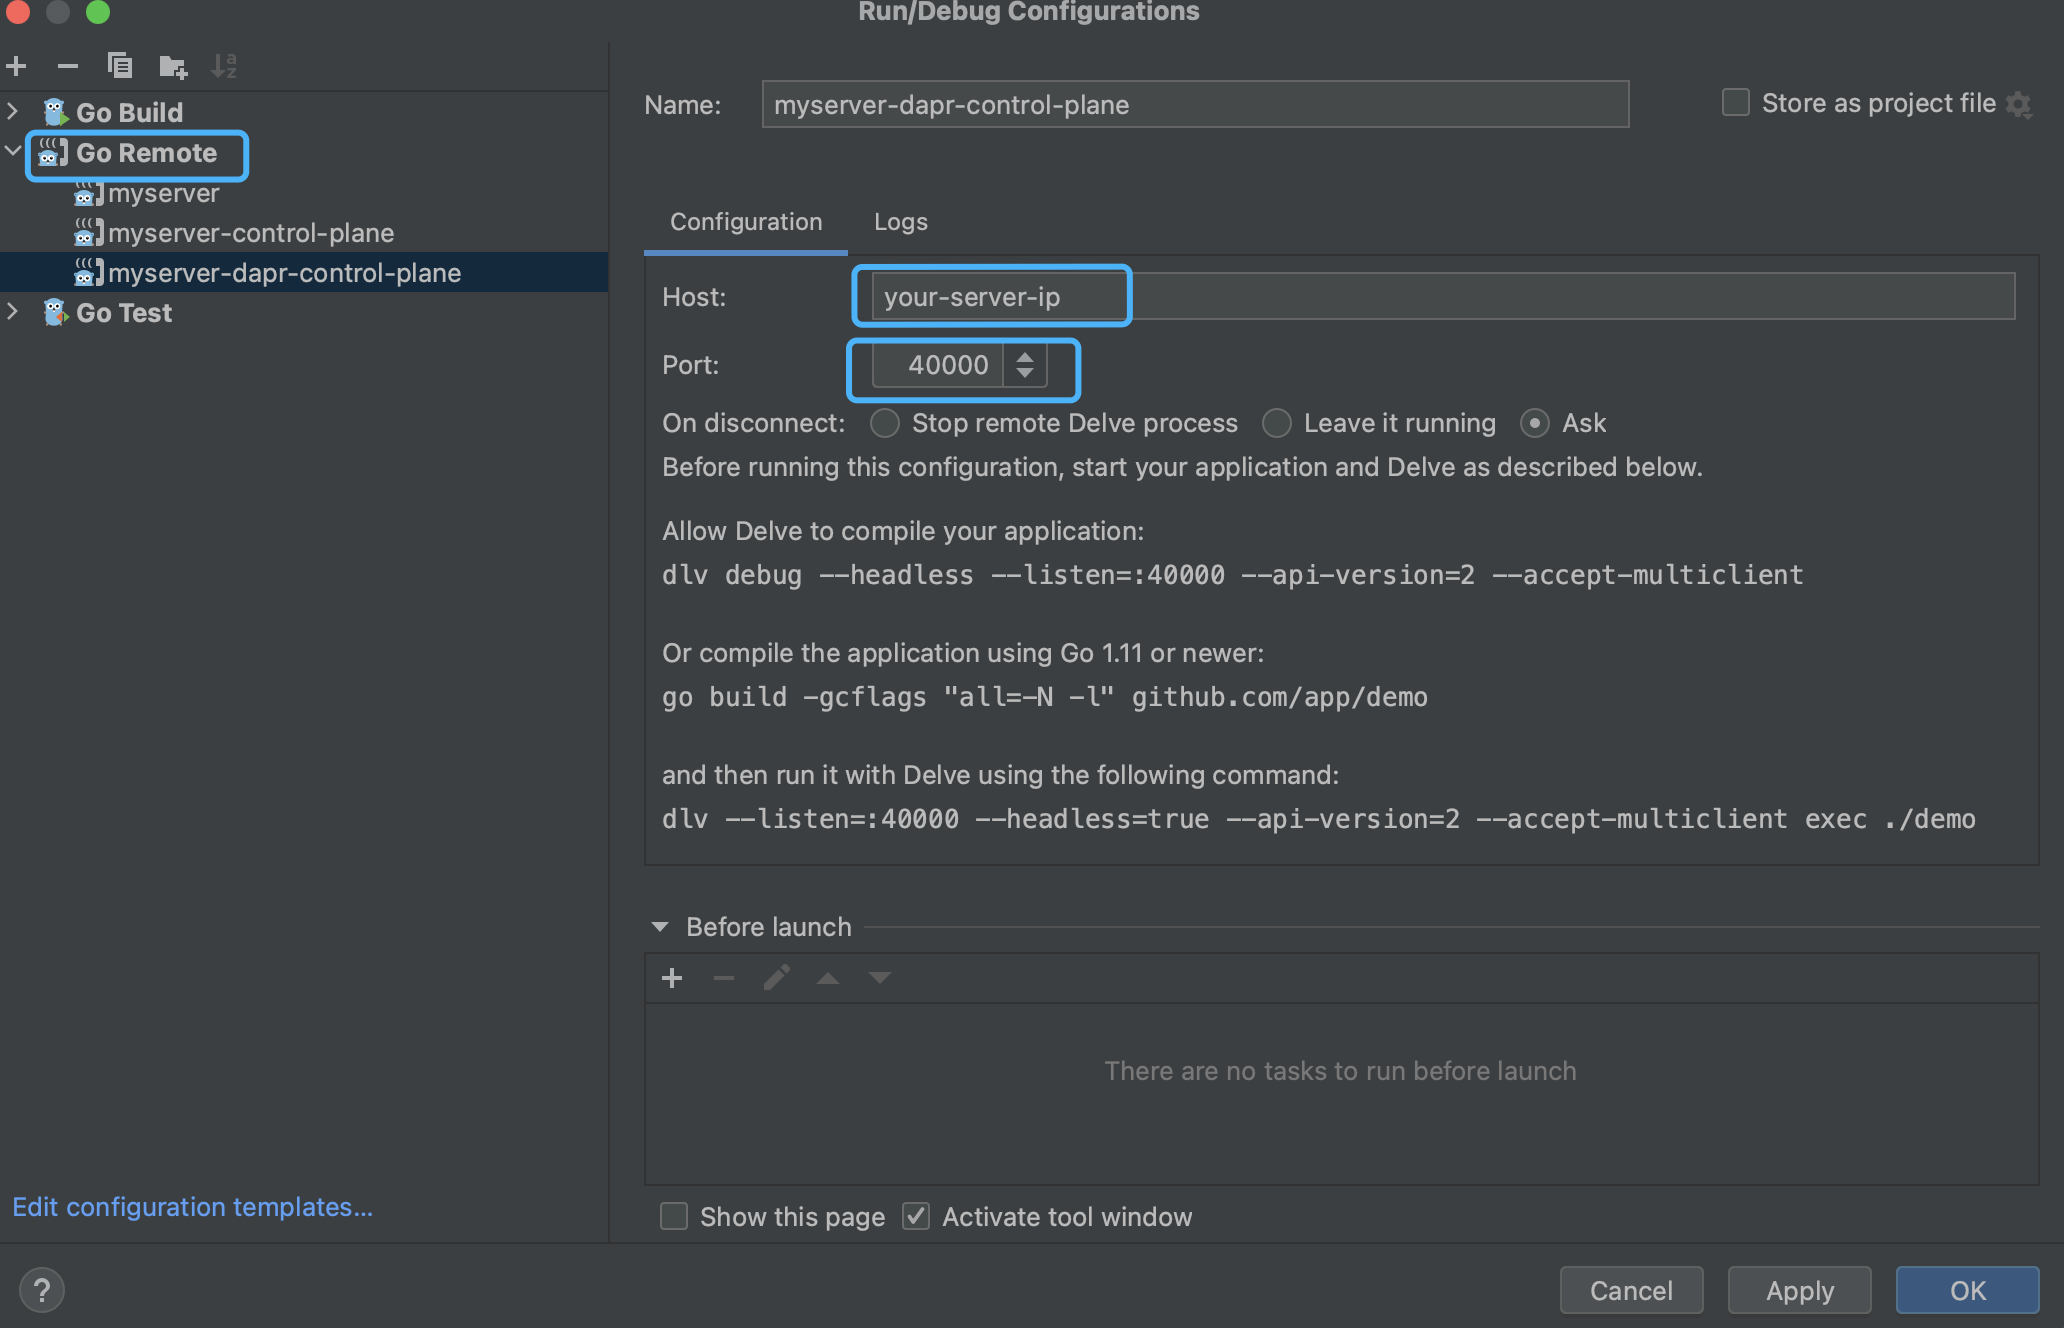
好了!现在你可以使用你最喜欢的IDE来进行远程调试了。以goland的为例,你可以进行如下配置:

注意
liveness probe
推荐手动修改对应的deployment,去掉liveness probe。dapr的控制面默认都是配置了k8s liveness probe的,如果你在调试过程中,
initialDelaySeconds
你会注意到给的样例values.yaml文件中含有initialDelaySeconds 这个值。initialDelaySeconds 字段告诉 kubelet 在执行第一次探测前应该等待多少秒。在去掉liveness probe的情况下我一般把这个值设置为30.
debug daprd
安装
这里是按照目前的官网教程来的,其实如果你已经安装了dapr的情况下这一步可以略过。
新建一个values.yml文件,写入以下内容
global:
   registry: docker.io/<your docker.io id>
   tag: "dev-linux-amd64"
然后通过helm命令安装
helm install dapr dapr/dapr --namespace dapr-system --create-namespace --values values.yml --wait
部署debug的daprd
为想要debug daprd的容器添加dapr.io/enable-debug: "true"annotions,以quickstarts/hello-kubernetes为例介绍如果想要debug某个app对应的daprd应该如何操作。
diff --git a/tutorials/hello-kubernetes/deploy/node.yaml b/tutorials/hello-kubernetes/deploy/node.yaml
index c63d06d..5bd50af 100644
--- a/tutorials/hello-kubernetes/deploy/node.yaml
+++ b/tutorials/hello-kubernetes/deploy/node.yaml
@@ -31,6 +31,7 @@ spec:
         app: node
       annotations:
         dapr.io/enabled: "true"
+        dapr.io/sidecar-liveness-probe-delay-seconds: "3000"
+        dapr.io/enable-debug: "true"
         dapr.io/app-id: "nodeapp"
         dapr.io/app-port: "3000"
         dapr.io/enable-api-logging: "true"
实际上这里可以通过添加dapr.io/sidecar-image: "your daprd image"来指定使用的daprd镜像。
查看pod名称
$ k get po
NAME                       READY   STATUS    RESTARTS        AGE
nodeapp-6f558dd569-95lms   1/2     Running   7 (2m24s ago)   8m8s
redis-master-0             1/1     Running   0               4d22h
redis-replicas-0           1/1     Running   0               4d22h
redis-replicas-1           1/1     Running   0               4d22h
redis-replicas-2           1/1     Running   0               4d22h
port-forward
如果你本地机器有kubeconfig文件,那么你可以在本地执行
$ kubectl port-forward nodeapp-6f558dd569-95lms 40000:40000

Forwarding from 127.0.0.1:40000 -> 40000
Forwarding from [::1]:40000 -> 40000
如果你在本地没有kubeconfig,但是你可以连接到某个有kubeconfig的机器,那么你就需要将port forward之后的端口设置为公网可访问,以便你可以从本地机器上连接。
$ kubectl port-forward nodeapp-6f558dd569-95lms --address='0.0.0.0' 40000:40000

Forwarding from 127.0.0.1:40000 -> 40000
Forwarding from [::1]:40000 -> 40000
IDE remote debug
这里就可以用你喜欢的IDE来remote debug了。具体步骤和配置与Dubug 控制面一样,因为dapr的调试端口都是40000.
发送请求并调试
将dapr端口暴露出来
diff --git a/tutorials/hello-kubernetes/deploy/debug.yaml b/tutorials/hello-kubernetes/deploy/debug.yaml
index c63d06d..d0a547c 100644
--- a/tutorials/hello-kubernetes/deploy/debug.yaml
+++ b/tutorials/hello-kubernetes/deploy/debug.yaml
@@ -11,6 +11,11 @@ spec:
   - protocol: TCP
     port: 80
     targetPort: 3000
+    name: node
+  - protocol: TCP
+    port: 3500
+    targetPort: 3500
+    name: dapr-http
   type: LoadBalancer
将dapr端口转发到本地
kubectl port-forward service/nodeapp --address='0.0.0.0' 3500:3500
发送请求
curl --request POST --data "@sample.json" --header Content-Type:application/json --header dapr-app-id:nodeapp http://localhost:3500/neworder